Keeping your Windows 11 PC clean and well-maintained is essential for ensuring optimal performance and longevity. Over time, clutter, junk files, and unnecessary applications can bog down your system, leading to slowdowns, crashes, and storage issues. Regular maintenance can prevent these problems and keep your computer running like new. This ultimate checklist will guide you through the most effective steps to clean and maintain your Windows 11 PC.
1. Enable and Configure Storage Sense
Storage Sense is a built-in feature that automatically clears temporary files, recycle bin contents, and downloads to free up space.
How to Enable Storage Sense:
- Go to Settings > System > Storage.
- Toggle Storage Sense to On.
- Click on Configure Storage Sense or run it now.
- Set the frequency to daily, weekly, or monthly and choose what types of files to delete.
Why It Matters: Automating the cleanup process helps maintain disk space without manual intervention.
2. Perform Disk Cleanup
Disk Cleanup removes unnecessary files such as system cache, old Windows installations, and temporary files.
Steps to Run Disk Cleanup:
- Press Windows + S and search for Disk Cleanup.
- Select the drive you want to clean (typically C:).
- Check the boxes next to file types you want to delete (e.g., Temporary Files, Recycle Bin).
- Click OK and confirm by selecting Delete Files.
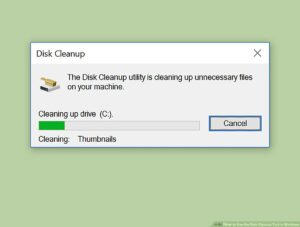
Why It Matters: Disk Cleanup reclaims valuable storage and enhances performance.
3. Uninstall Unused Applications
Unused applications consume disk space and can slow down your PC. Removing them frees up storage and system resources.
How to Uninstall Apps:
- Open Settings > Apps > Apps & features.
- Scroll through the list and select apps you no longer need.
- Click Uninstall.
Why It Matters: Uninstalling unused apps reduces background processes and speeds up your PC.
4. Delete Temporary Files Manually
Temporary files build up over time and occupy disk space. Regularly deleting them helps maintain system efficiency.
How to Delete Temp Files:
- Press Windows + R to open the Run dialog.
- Type %temp% and press Enter.
- Select all files and delete them.
- Empty the Recycle Bin to finalize the cleanup.
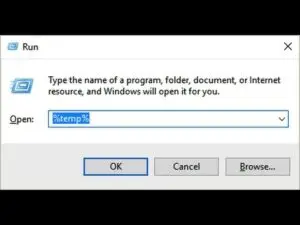
Why It Matters: Deleting temp files can instantly free up gigabytes of storage.
5. Manage Startup Programs
Too many startup programs can slow down boot times. Managing these programs ensures faster system startup.
How to Manage Startup Programs:
- Press Ctrl + Shift + Esc to open Task Manager.
- Go to the Startup tab.
- Disable unnecessary programs by right-clicking and selecting Disable.
Why It Matters: Disabling unnecessary startup apps improves boot speed and reduces resource usage.
6. Clean Browser Cache and Cookies
Browsers store cache and cookies that can take up significant space over time. Clearing them enhances browser speed and frees storage.
How to Clear Cache:
- Google Chrome: Go to Settings > Privacy and security > Clear browsing data.
- Microsoft Edge: Press Ctrl + Shift + Delete and choose Cached images and files.
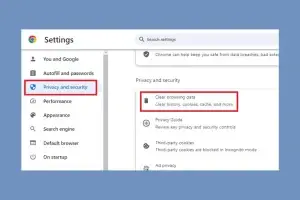
Why It Matters: Clearing browser cache improves both browser and overall system performance.
7. Defragment and Optimize Drives
Defragmenting reorganizes data on your hard drive, allowing faster file access and better performance.
How to Defragment:
- Press Windows + S and search for Defragment and Optimize Drives.
- Select the drive to optimize and click Optimize.
Why It Matters: Regular defragmentation can enhance file access speeds and overall drive health.
8. Disable Hibernation
Hibernation uses disk space to save your session. Disabling it can reclaim significant storage.
How to Disable Hibernation:
- Press Windows + S and search for Command Prompt.
- Right-click and choose Run as administrator.
- Type powercfg /hibernate off and press Enter.
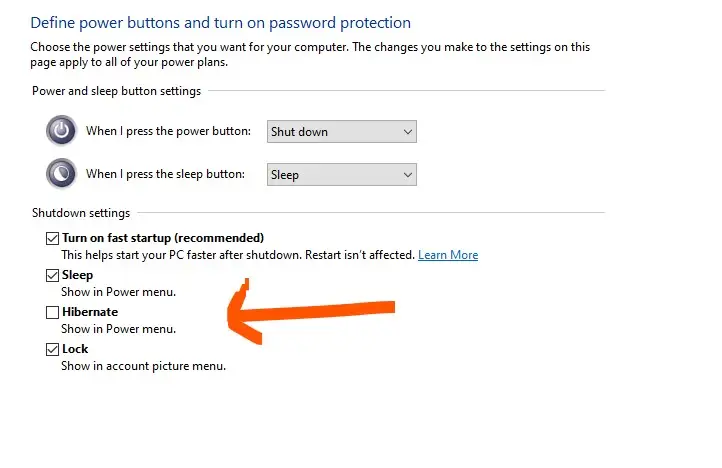
Why It Matters: Disabling hibernation can free up several gigabytes of space.
9. Update Windows and Drivers
Keeping Windows and drivers updated ensures better performance and security.
How to Update Windows:
- Go to Settings > Windows Update.
- Click Check for updates and install available updates.
How to Update Drivers:
- Use Device Manager to manually update drivers or download them from the manufacturer’s website.
Why It Matters: Regular updates fix bugs, improve compatibility, and enhance performance.
10. Use Third-Party PC Cleaning Tools
Third-party tools offer more advanced cleaning and optimization features.
Recommended Tools:
- CCleaner
- Advanced SystemCare
- Glary Utilities
Why It Matters: These tools often provide deeper cleaning and additional performance tweaks.
11. Remove Duplicate Files
Duplicate files waste storage space. Removing them helps declutter your PC.
How to Find and Remove Duplicates:
- Use tools like Duplicate Cleaner or dupeGuru to locate and delete duplicate files.
Why It Matters: Removing duplicates can reclaim storage space quickly.
12. Backup Important Data
Backing up data prevents loss in case of hardware failure.
How to Backup Data:
- Use OneDrive or an external drive to store essential files.
Why It Matters: Regular backups protect against data loss and ensure your files are safe.
Following this checklist ensures your Windows 11 PC remains fast, efficient, and clutter-free. Regular maintenance prevents slowdowns, maximizes storage, and extends your computer’s lifespan.


