Over time, your Windows 11 system can accumulate temporary files and cache, which can slow down performance and take up valuable disk space. Regularly cleaning these files is crucial for maintaining your PC’s speed and efficiency. In this guide, we’ll walk you through the best methods to clean temporary files and cache on Windows 11.
Why Clean Temporary Files and Cache?
Temporary files and cache are created by applications and the operating system to store data temporarily. While these files can help speed up processes, they tend to accumulate and consume disk space over time. This can lead to slower performance, reduced storage capacity, and potential system errors.
By regularly cleaning these files, you can:
- Free up disk space.
- Improve system performance.
- Prevent software glitches.
- Speed up application launch times.
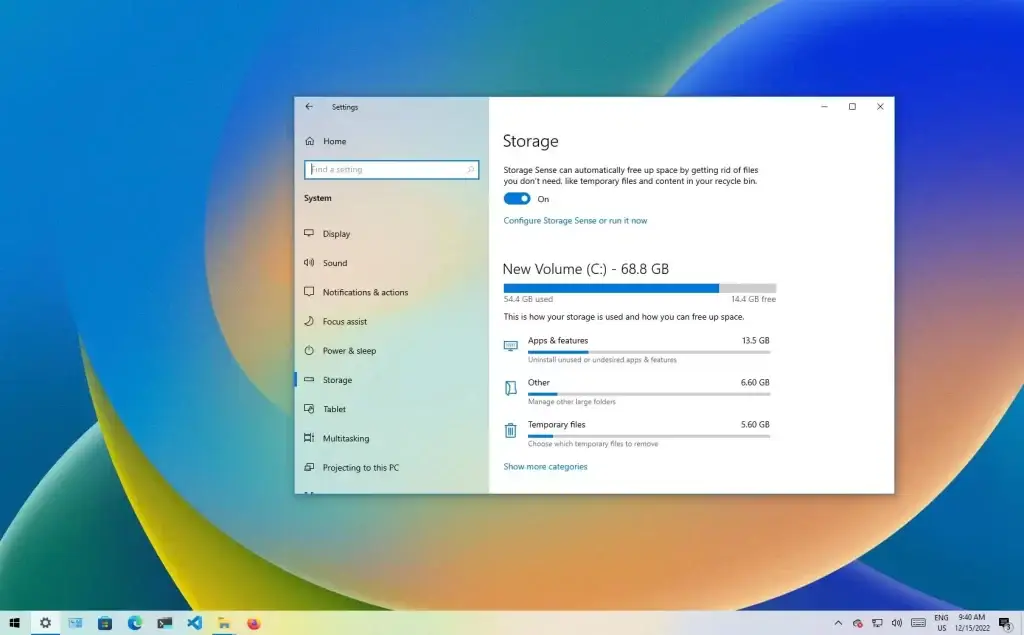
1. Use Windows Settings to Delete Temporary Files
Windows 11 provides a straightforward way to delete temporary files through the Settings app.
Steps to Delete Temporary Files:
- Press Windows + I to open Settings.
- Navigate to System > Storage.
- Click on Temporary files.
- Windows will scan your system and display a list of files you can remove.
- Check the boxes for Temporary files, Downloads, Recycle Bin, and any other unnecessary files.
- Click Remove files to delete them.
This method is easy and effective for regular maintenance.
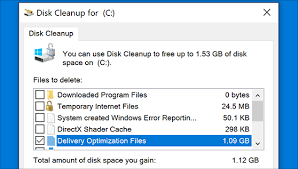
2. Clear Cache Using Disk Cleanup
Disk Cleanup is a built-in Windows tool designed to remove unnecessary files and free up space.
Steps to Run Disk Cleanup:
- Type Disk Cleanup in the Windows search bar and open the application.
- Select the drive you want to clean (usually C:).
- Disk Cleanup will calculate the amount of space you can free up.
- Check the boxes for Temporary files, System cache, and Thumbnails.
- Click OK and then Delete files.
Running Disk Cleanup periodically keeps your system clean and optimized.
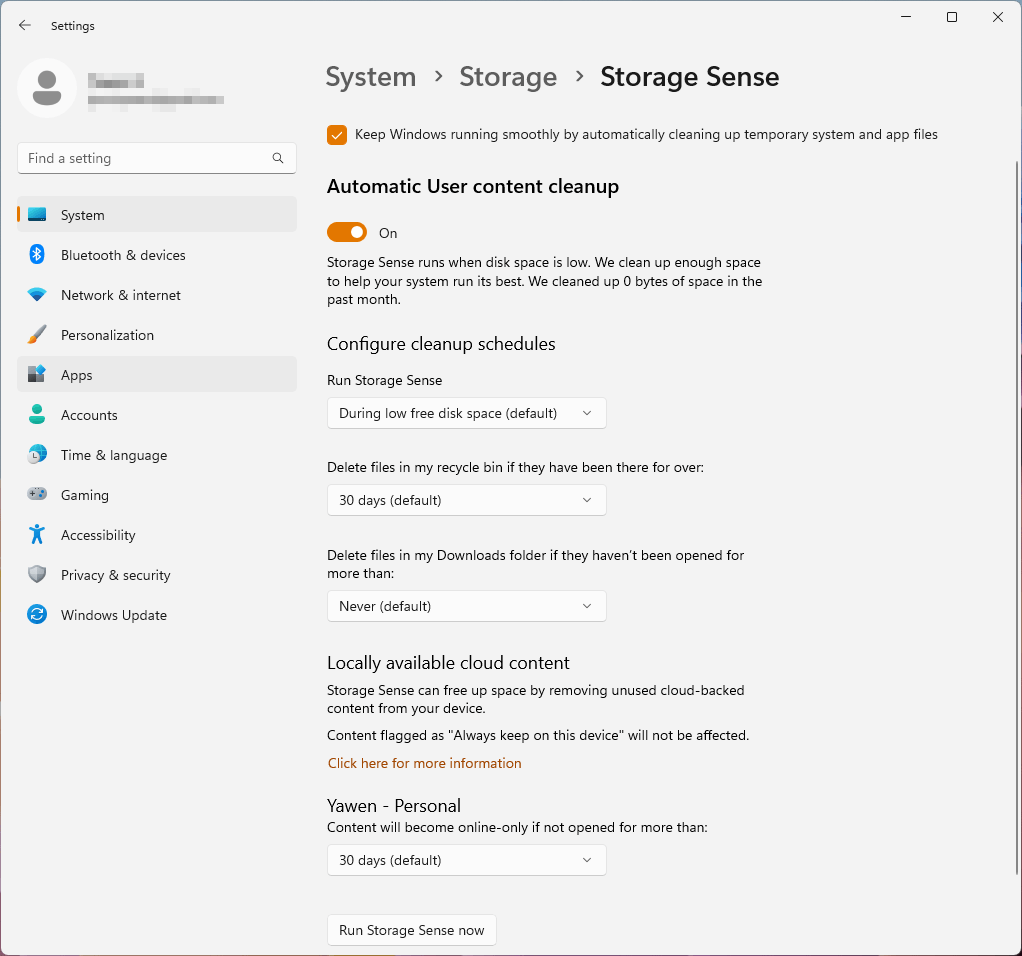
3. Use Storage Sense for Automatic Cleanup
Windows 11 features Storage Sense, an automated tool that helps manage disk space by deleting unnecessary files automatically.
Steps to Enable Storage Sense:
- Go to Settings > System > Storage.
- Toggle on Storage Sense.
- Click on Configure Storage Sense or run it now.
- Customize settings to delete files in the Recycle Bin, Downloads folder, and temporary files at regular intervals.
- Click Run Storage Sense Now to perform an immediate cleanup.
With Storage Sense activated, your PC will automatically stay clutter-free.
4. Manually Delete Temporary Files
If you prefer manual control, you can directly delete temporary files.
Steps to Manually Delete Temporary Files:
- Press Windows + R, type %temp%, and press Enter.
- The Temp folder will open. Select all files (Ctrl + A) and delete them.
- Go back to the Run dialog and type temp (without %). Repeat the process.
- Finally, type prefetch in the Run dialog and delete all files in that folder.
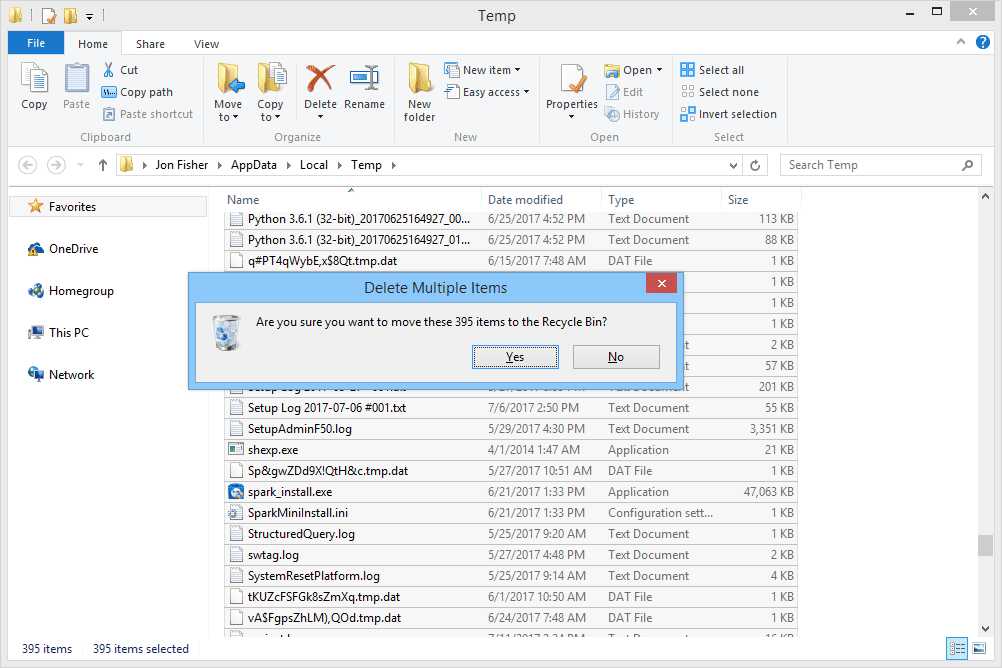
These folders hold temporary files that are safe to delete.
5. Clear Browser Cache
Browser cache can accumulate and slow down your internet experience. Clearing cache from your web browsers can enhance speed and responsiveness.
Steps to Clear Browser Cache:
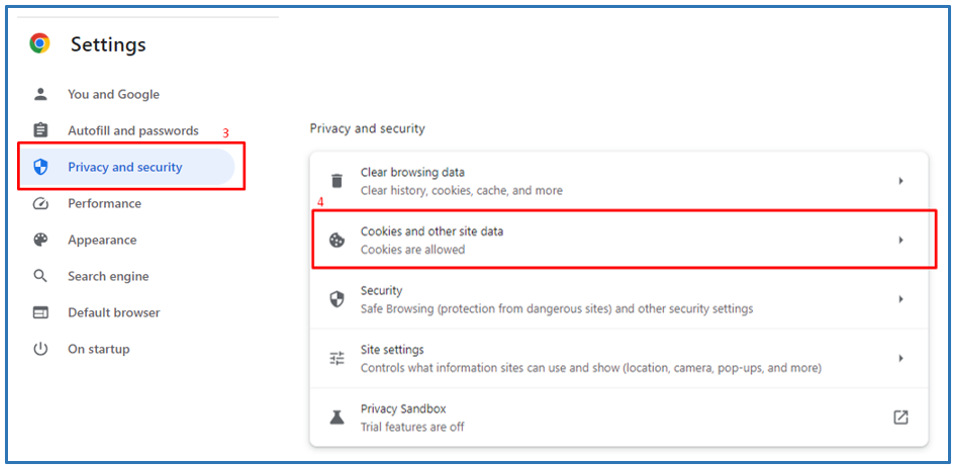
- For Google Chrome:
- Click on the three dots in the upper right corner and go to Settings.
- Select Privacy and Security > Clear browsing data.
- Choose Cached images and files and click Clear data.
- For Microsoft Edge:
- Click on the three dots and go to Settings.
- Select Privacy, search, and services > Choose what to clear.
- Check Cached images and files and click Clear now.
- For Firefox:
- Click the menu and go to Settings > Privacy & Security.
- Under Cookies and Site Data, click Clear Data and select Cache.
6. Delete System Restore Points
System Restore points can take up significant disk space. Deleting old restore points can free up space.
Steps to Delete System Restore Points:
- Type Create a restore point in the search bar and open it.
- Click on Configure.
- Select Delete to remove all restore points.
- Adjust the Max Usage slider to limit the space used for restore points.
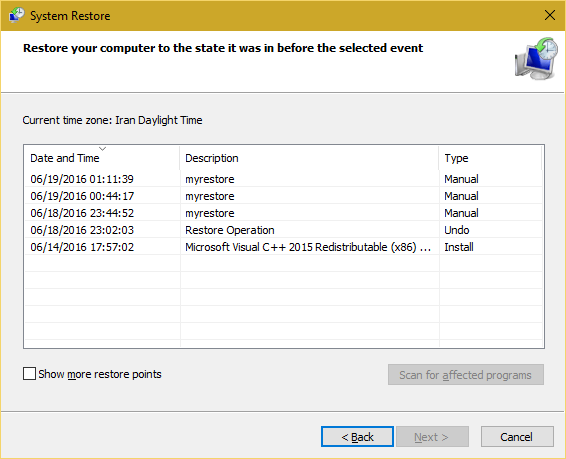
Only keep necessary restore points to save space.
7. Clean WinSxS Folder
The WinSxS folder stores backup files and older versions of Windows updates. Cleaning it can reclaim disk space.
Steps to Clean WinSxS Folder:
- Open Command Prompt as Administrator.
- Type the following command: Dism /Online /Cleanup-Image /StartComponentCleanup
- Press Enter and let the process complete.
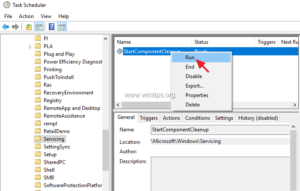
This reduces the size of the WinSxS folder without affecting system stability.
8. Use Third-Party Tools
Several third-party tools can help clean temporary files and cache efficiently.
Recommended Tools:
- CCleaner – Cleans temporary files, cache, and registry errors.
- BleachBit – Open-source tool for deep cleaning.
- Glary Utilities – Comprehensive system maintenance.
Download and install these tools to automate the cleanup process.
9. Optimize Windows Update Cleanup
Windows Update files can accumulate and take up space. Cleaning them helps maintain performance.
Steps to Clean Windows Update Files:
- Open Disk Cleanup.
- Click Clean up system files.
- Select Windows Update Cleanup and click OK.
This method helps reclaim storage taken by old updates.
Final Thoughts
Cleaning temporary files and cache on Windows 11 is essential for maintaining optimal performance and freeing up disk space. By following these steps regularly, you can keep your system running smoothly and avoid unnecessary slowdowns.


