
Windows 11 introduces a modern, efficient design with improved performance, but even the most advanced systems can benefit from optimization. By fine-tuning system settings and leveraging the right tools, you can significantly enhance the speed, responsiveness, and overall productivity of your Windows 11 device. This guide explores essential tools and settings to help you unlock peak performance.
1. Keep Windows 11 Updated
Frequent updates from Microsoft ensure your operating system remains secure, stable, and optimized. Each update can include bug fixes, performance improvements, and new features.
Steps to Update Windows 11:
- Go to Settings > Windows Update.
- Click Check for Updates.
- Install any pending updates and restart your system if necessary.
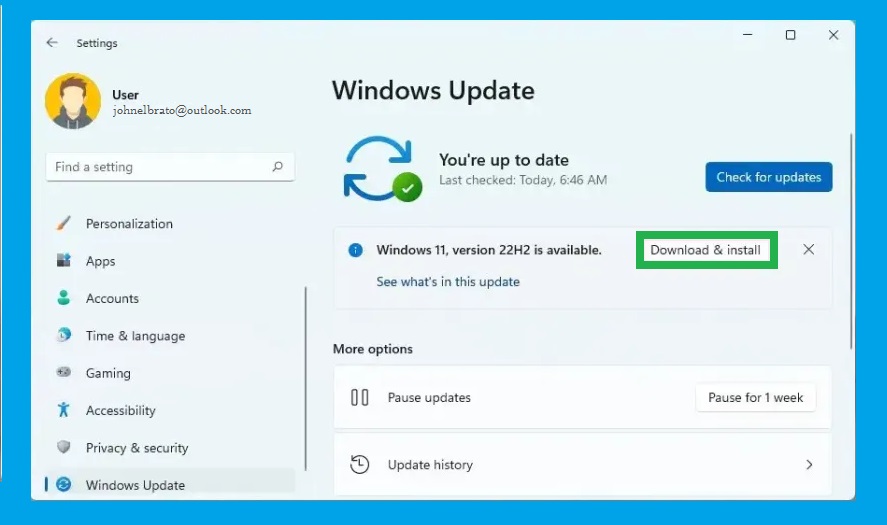
Regular updates improve system efficiency and security, addressing vulnerabilities that could slow down performance.
2. Use Storage Sense to Free Up Space
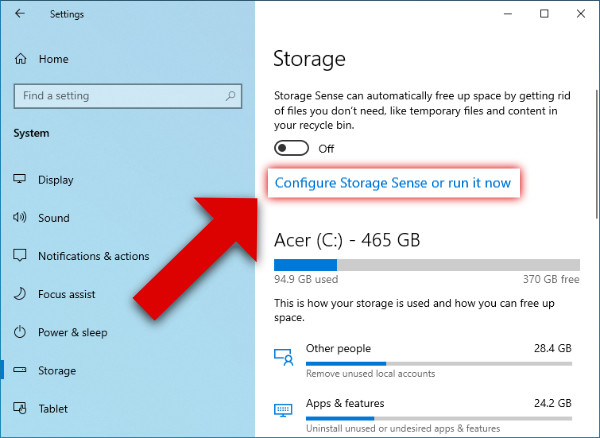
Storage Sense automatically manages disk space by deleting temporary files and recycling bin contents. Keeping your storage clean ensures faster processing and smoother performance.
Steps to Enable Storage Sense:
- Go to Settings > System > Storage.
- Enable Storage Sense and configure it to run automatically.
- Customize how frequently files are deleted to maintain optimal disk space.
3. Disable Startup Programs
Excessive startup programs can bog down your system during boot-up. By limiting the number of applications launching at startup, you can accelerate your system’s load time.
Steps to Manage Startup Programs:
- Press Ctrl + Shift + Esc to open Task Manager.
- Click on the Startup tab.
- Disable unnecessary programs by right-clicking and selecting Disable.
Reducing startup load ensures quicker boot times and enhances overall responsiveness.
4. Adjust Visual Effects for Performance
While Windows 11’s sleek animations and transparency effects are visually appealing, they can consume system resources. Disabling or adjusting these features can boost performance.
Steps to Adjust Visual Effects:
- Press Win + R, type sysdm.cpl, and hit Enter.
- Navigate to the Advanced tab and click Settings under Performance.
- Select Adjust for best performance or manually deselect specific effects.
By prioritizing performance over aesthetics, you can achieve a faster and more responsive system.
5. Optimize Power Settings
Customizing power settings can significantly impact performance, particularly on laptops. Selecting a high-performance power plan ensures your system operates at its maximum capacity.
Steps to Optimize Power Settings:
- Go to Control Panel > Hardware and Sound > Power Options.
- Select High performance or create a custom plan.
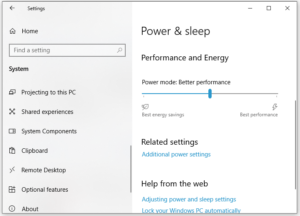
High-performance plans prioritize speed and responsiveness over energy saving.
6. Leverage Disk Cleanup and Defragmentation
Windows 11 offers built-in tools like Disk Cleanup and Defragmentation to enhance storage efficiency.
Steps for Disk Cleanup:
- Search Disk Cleanup in the Start menu.
- Select the drive you want to clean and click OK.
- Choose the files to delete and click Clean up system files.
Steps to Defragment Drives:
- Go to Settings > System > Storage > Advanced storage settings > Drive Optimization.
- Select the drive and click Optimize.
Regular cleanup and defragmentation keep drives organized and improve data retrieval times.
7. Utilize Performance Monitor and Resource Monitor
Performance Monitor and Resource Monitor provide insights into system performance, allowing you to identify and address bottlenecks.
Steps to Access Performance Monitor:
- Press Win + R, type perfmon, and hit Enter.
- Use the tool to track CPU, memory, and disk usage.
Steps to Use Resource Monitor:
- Press Ctrl + Shift + Esc to open Task Manager.
- Go to the Performance tab and click Open Resource Monitor.
Monitoring system activity can help pinpoint performance issues and resource-hungry applications.
8. Uninstall Unnecessary Apps and Bloatware
Pre-installed apps and bloatware can consume valuable system resources. Removing unused applications frees up space and improves overall performance.
Steps to Uninstall Apps:
- Go to Settings > Apps > Apps & features.
- Select the app you wish to remove and click Uninstall.
Regularly decluttering apps optimizes storage and enhances system speed.
9. Manage Virtual Memory (Page File)
Virtual memory acts as an extension of physical RAM. Properly managing page file settings can improve multitasking and system stability.
Steps to Adjust Virtual Memory:
- Press Win + R, type sysdm.cpl, and hit Enter.
- Go to the Advanced tab and click Settings under Performance.
- In the new window, select the Advanced tab and click Change under Virtual memory.
- Customize the page file size according to your needs.
Optimizing virtual memory enhances system responsiveness, especially during heavy multitasking.
10. Use ReadyBoost for Additional Performance
ReadyBoost utilizes USB drives to enhance system memory, improving performance, particularly on older devices.
Steps to Enable ReadyBoost:
- Insert a USB drive.
- Right-click the USB drive in File Explorer and select Properties.
- Go to the ReadyBoost tab and allocate space.
ReadyBoost supplements system RAM, enhancing performance on lower-end machines.
11. Disable Background Apps
Background apps can consume resources without your knowledge. Disabling unnecessary background applications improves performance.
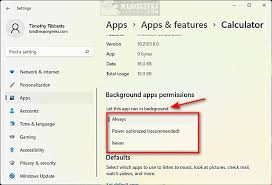
Steps to Disable Background Apps:
- Go to Settings > Apps > Apps & Features.
- Select an app, click Advanced Options, and disable Background app permissions.
Limiting background activity conserves resources and extends battery life.
12. Update Drivers
Outdated drivers can lead to performance bottlenecks and hardware malfunctions. Ensuring all drivers are up to date enhances compatibility and performance.
Steps to Update Drivers:
- Go to Device Manager.
- Right-click a device and select Update driver.
- Choose Search automatically for drivers.

Regular driver updates prevent hardware conflicts and ensure smooth operation.
13. Optimize OneDrive Sync Settings
OneDrive sync can slow down system performance, particularly if many files are syncing simultaneously.
Steps to Manage OneDrive Sync:
- Right-click the OneDrive icon in the taskbar.
- Click Pause syncing when performing intensive tasks.
Optimizing sync settings prevents unnecessary system slowdowns.
Conclusion
Optimizing Windows 11 for peak performance involves a combination of managing system resources, disabling unnecessary features, and using built-in tools. By applying these techniques, you can enhance speed, responsiveness, and overall efficiency, ensuring your Windows 11 device operates at its best.


