Mouse Button
The Mouse Button section allows you to choose which mouse button the Auto Clicker will simulate. You have three options:

- Mouse Left: Automates left-clicking, which is the most commonly used click action in most applications and games.
- Mouse Middle: Automates middle mouse clicks, often used for scrolling or special functions in certain applications.
- Mouse Right: Automates right-clicking, typically used to open context menus or perform other secondary actions.
How to Use:
- Select the radio button corresponding to the mouse button you wish to automate.
- The Auto Clicker will begin simulating clicks using the selected mouse button when activated.
Click Type
The Click Type section allows you to choose whether the Auto Clicker will perform a single click or a double click. You have two options:
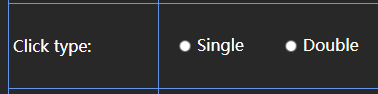
- Single: Automates a single mouse click for each interval.
- Double: Automates a double mouse click (two quick clicks) for each interval.
How to Use:
- Select either Single or Double based on your need for single or double clicks.
- The Auto Clicker will follow the selected click type once activated.
Click Position
The Click Position section allows you to determine where the automated clicks will occur on the screen. You have two options:

- Current Location: The Auto Clicker will click wherever the mouse cursor is currently located. This allows you to move the cursor freely, and the clicks will follow.
- Pick Location: Allows you to select a fixed position on the screen where all clicks will occur. You can either:
- Manually enter the X and Y coordinates of the desired location in the provided entry boxes.
- Click the Pick Location button and manually select the spot by clicking directly on the screen.
How to Use:
- Select either Current Location for dynamic clicking, or Pick Location for a fixed click position.
- If using Pick Location, either enter the coordinates or use the Pick Location button to select the area on your screen.
Click Interval
The Click Interval section allows you to define how frequently the Auto Clicker will simulate mouse clicks. You can set the time intervals between clicks in hours, minutes, seconds, and milliseconds.

- Hours: Number of hours to wait between clicks.
- Minutes: Number of minutes to wait between clicks.
- Seconds: Number of seconds to wait between clicks.
- Milliseconds: Number of milliseconds to wait between clicks. (1 second = 1000 milliseconds)
How to Use:
- Enter the desired interval in the appropriate boxes (hours, minutes, seconds, milliseconds).
- The Auto Clicker will simulate a click at the set interval once started.
Click Repeat
The Click Repeat section allows you to control how many times the Auto Clicker will repeat the mouse clicks. You have two options:

- Repeat until stopped: The Auto Clicker will continue clicking indefinitely until you manually stop it.
- Repeat: The Auto Clicker will repeat the clicks a specified number of times. You can enter the desired number of repetitions in the provided entry box.
How to Use:
- Select Repeat until stopped if you want continuous clicks until you decide to stop the Auto Clicker.
- Select Repeat and enter the number of times you want the Auto Clicker to click.
Get Bree Office - Best Alternative to Microsoft Office - Free Download
All-in-one office suite to view and edit multiple types of files, including PDF, Word, Excel, PowerPoint, and eBooks.
