Bree Office – Image Viewer

The Image Viewer module is part of Bree Office, designed for efficient viewing and management of image files. It provides essential tools for opening, saving, printing, and rotating images, as well as zooming and navigating through image folders. With features like zoom adjustment, image layout options, and seamless folder navigation, the Image Viewer offers a user-friendly interface for both casual and professional use.

Refer to the Overview section of the Bree Office help file to learn how to open image files.

1. Manage image files

The Image Viewer module allows you to perform essential file-level operations for images and photos using the File menu.

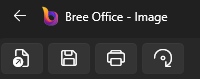
  • Open Image: Click the Open option to browse and select an image file to view.
  • Save As: Save the current image with a new file name or to a different location.
  • Print: Send the image to your connected printer for printing.
  • Rotate: Rotate the image clockwise or counterclockwise for viewing purposes. This action does not alter the original image file.

2. Zoom and image layout

Adjust the zoom level and layout of images using the tools located at the bottom toolbar of the Image Viewer module:

  • Zoom to Actual Size: Display the image at its original resolution.
  • Zoom to Fit: Resize the image to fit entirely within the viewer window.
  • Zoom Settings Dropdown Menu: Select a predefined zoom level from a list of options.
  • Zoom Slider: Manually adjust the zoom level by sliding the control to zoom in or out.

3. Navigate through folder

Easily browse through images in the same folder using the navigation controls located at the bottom center of the Image Viewer window:

  • Previous Image: Click to view the image that comes before the current one in the folder.
  • Next Image: Click to view the image that follows the current one in the folder.

4. Printing an eBook

  1. Access the Print Option:

    • Click on the File menu in the toolbar and select Print.
    • Alternatively, use the shortcut Ctrl+P (Windows) or Cmd+P (Mac) to open the Print dialog box.
  2. Configure Print Settings:

    • In the Print dialog box, select your printer from the dropdown list.
    • Adjust the print options as needed:
      • Pages to Print: Choose specific pages or print the entire eBook.
      • Page Layout: Select single-page or double-sided printing if your printer supports it.
      • Scaling: Choose fit-to-page, actual size, or custom scaling options.
      • Color Options: Print in color or grayscale.
  3. Preview the Print Output (Optional):

    • Use the preview pane (if available) to check the layout and alignment before printing.
  4. Print:

    • Once all settings are configured, click Print to start printing your eBook.

5. Additional Features

  • Full-Screen Mode: Maximize your reading area by enabling full-screen mode from the toolbar.
    • ☰ > View > Fullscreen
  • Recent Files: Quickly access recently opened eBooks from the File menu.
    • ☰ > File > select from the bottom section of the menu

Table of Contents

DOCX Editor Plus

Get a modern, full-featured word processing app to create and edit .docx, .doc, .rtf and more.