Windows 11 offers a sleek, modern interface with advanced features that can significantly enhance the gaming experience. However, to get the most out of your gaming PC, you need to optimize your system’s performance. Over time, your computer can become bogged down by unnecessary files, background processes, and system settings that hinder your gaming experience. Fortunately, there are several steps you can take to clean and optimize your Windows 11 setup, allowing you to enjoy smoother gameplay and higher performance.
In this article, we’ll cover key tips on how to clean and optimize Windows 11 for gaming and high performance. Whether you’re an occasional gamer or a competitive player, these steps will help you maximize your gaming experience.
1. Update Your Graphics Drivers
Before diving into system optimizations, it’s important to ensure that your graphics card drivers are up-to-date. Outdated or incompatible drivers can cause performance issues in games, including stuttering, lower frame rates, and crashes.
Steps to Update Graphics Drivers:
- Via Device Manager:
- Press
Win + Xand select Device Manager. - Expand the Display adapters section.
- Right-click on your graphics card and select Update driver.
- Choose Search automatically for updated driver software.
- Press
- Via Graphics Card Software (NVIDIA, AMD, Intel):
- Use the software provided by your GPU manufacturer, such as NVIDIA GeForce Experience, AMD Radeon Software, or Intel’s Driver & Support Assistant, to download and install the latest drivers.

Updating your drivers regularly ensures better compatibility with the latest games and enhances overall performance.
2. Enable Game Mode
Windows 11 includes a Game Mode that helps allocate system resources more efficiently to the game you’re playing, giving it higher priority. This can improve gaming performance by reducing background activity and boosting frame rates.
How to Enable Game Mode:
- Open Settings by pressing
Win + I. - Navigate to Gaming and click on Game Mode.
- Toggle the Game Mode switch to On.
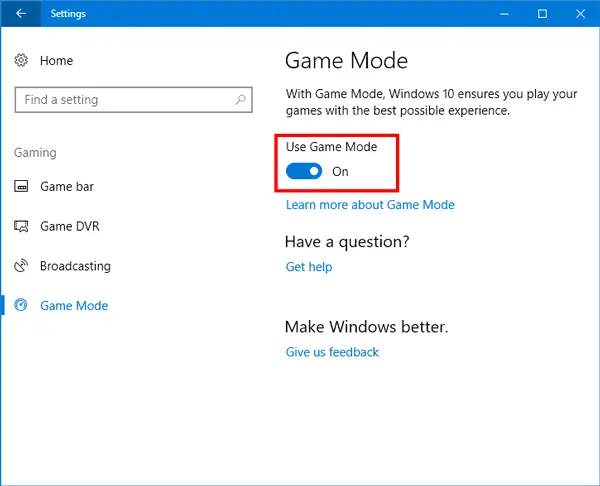
When enabled, Game Mode optimizes your PC’s performance while gaming, making sure that resources are dedicated to the game without being interrupted by background processes.
3. Optimize Power Settings
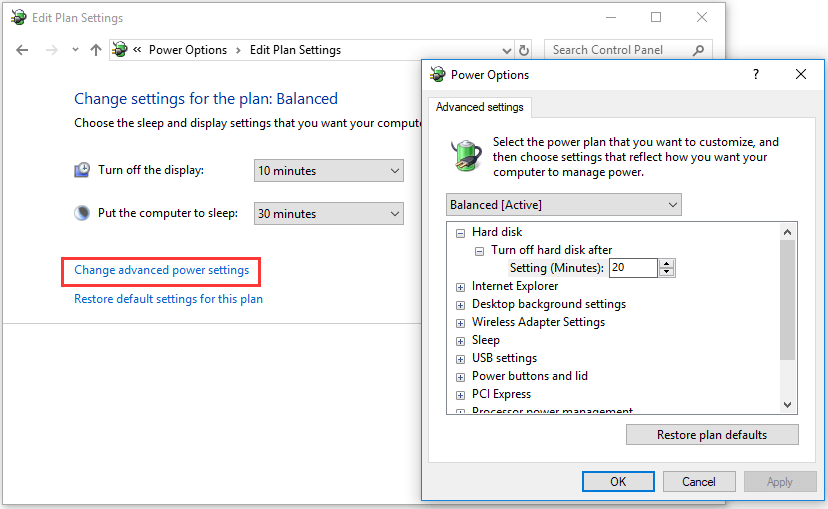
To maximize gaming performance, you’ll want to make sure your PC is using the highest available power settings. By default, Windows 11 may be set to Balanced power mode, which can throttle performance to save energy. For gaming, you’ll want to ensure your PC is running in High Performance mode.
Steps to Adjust Power Settings:
- Press
Win + Xand select Power Options. - Click on Additional power settings.
- Choose High performance (if available) or click Show additional plans to enable it.
If you’re using a laptop, keep in mind that using High Performance mode may significantly drain your battery, so it’s best used while plugged into power.
4. Clean Up Temporary Files and System Junk
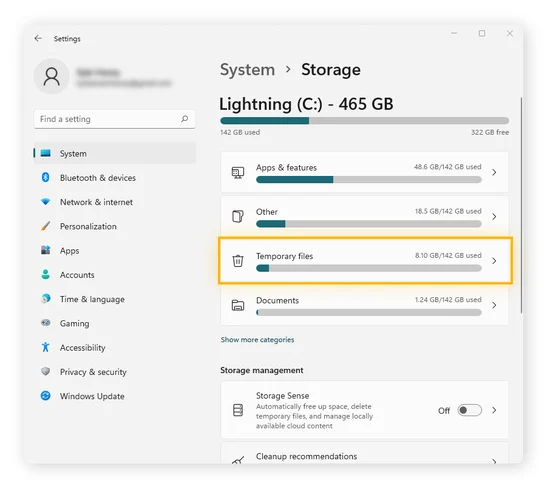
Over time, your system accumulates unnecessary files, such as cache, temporary files, and system logs, which can take up valuable storage space and slow down your PC. Cleaning up these files can help boost overall system performance.
Steps to Clean Up Temporary Files:
- Open Settings and go to System.
- Click on Storage and select Temporary files.
- Check the boxes next to the types of files you want to delete (such as system logs, cache, and temporary files).
- Click Remove files.
Alternatively, you can use the built-in Disk Cleanup tool:
- Press
Win + Sand search for Disk Cleanup. - Select the drive you want to clean and click OK.
- Check the file types you want to delete and click OK to start cleaning.
5. Disable Unnecessary Startup Programs
When you boot up Windows 11, several programs may automatically start running in the background. These programs consume system resources and can slow down your PC, especially when gaming. Disabling unnecessary startup programs can improve your system’s performance.
Steps to Disable Startup Programs:
- Press
Ctrl + Shift + Escto open Task Manager. - Go to the Startup tab.
- Right-click on any unnecessary programs and select Disable.
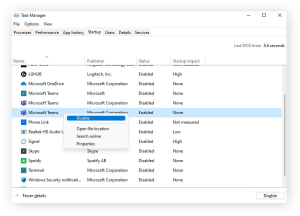
Be sure to leave essential programs enabled (like your antivirus software), but disable anything that isn’t required at startup.
6. Adjust Visual Effects for Performance
Windows 11 includes a variety of visual effects that can make the interface look more attractive but can also consume valuable system resources. Disabling or reducing some of these effects can improve performance, especially on lower-end systems.
Steps to Adjust Visual Effects:
- Press
Win + Xand select System. - Click on Advanced system settings on the right.
- Under the Advanced tab, click on Settings under Performance.
- In the Performance Options window, select Adjust for best performance or manually choose which visual effects to disable.
Reducing the number of visual effects can free up system resources for gaming, leading to smoother gameplay.
7. Defragment and Optimize Your Hard Drive (HDD)
If you are using a traditional hard drive (HDD), defragmenting it periodically is essential to ensure your files are stored efficiently. Fragmentation can cause slower load times and reduced performance in games. Windows 11 has a built-in tool for defragmenting and optimizing your HDD.
Steps to Defragment and Optimize:
- Press
Win + Sand search for Defragment and Optimize Drives. - Select your HDD from the list and click Optimize.
Note: If you’re using a solid-state drive (SSD), defragmentation isn’t necessary, as SSDs don’t experience the same type of fragmentation issues as HDDs. However, Windows will optimize the SSD for performance.
8. Manage Background Processes and Services
Some processes and services running in the background can consume CPU, RAM, and disk resources, affecting gaming performance. You can manage these processes to improve overall system performance.
Steps to Disable Background Processes:
- Open Task Manager by pressing
Ctrl + Shift + Esc. - Go to the Processes tab.
- Right-click on unnecessary background processes and select End Task.
You can also disable non-essential services by typing msconfig into the Start menu and accessing System Configuration. Under the Services tab, uncheck non-essential services to free up resources.
9. Install an SSD (Solid State Drive)
If you’re still using a traditional hard drive, upgrading to an SSD is one of the best ways to boost performance. SSDs are much faster than HDDs, leading to shorter load times and improved overall performance. Games will load quicker, and your system will feel much more responsive.
If your system already has an SSD, make sure it’s configured as your primary storage device for your operating system and games.
10. Monitor System Performance and Make Adjustments
After making these optimizations, it’s essential to monitor your system’s performance to ensure everything is running as expected. Tools like Task Manager, MSI Afterburner, or HWMonitor can help you track the CPU, GPU, and RAM usage while gaming.
If you notice any performance bottlenecks, consider adjusting settings further, such as reducing in-game graphics settings or overclocking your CPU/GPU if your hardware supports it.
Conclusion
Optimizing Windows 11 for gaming and high performance is essential for getting the best experience out of your gaming system. By following the steps outlined in this article—such as updating drivers, enabling Game Mode, optimizing power settings, and cleaning up your system—you can significantly improve performance and enjoy smoother, faster gameplay.
Remember, a clean and optimized system not only enhances gaming performance but also improves overall PC responsiveness. Regular maintenance, such as clearing temporary files, managing background processes, and updating drivers, will keep your system running efficiently for years to come. Whether you’re into casual gaming or high-performance titles, these optimizations will ensure your Windows 11 PC is ready for action!


