
Windows 11 is built with gaming in mind, offering features that can enhance the gaming experience. However, to get the most out of your gaming rig, some optimizations are necessary. From fine-tuning graphics settings to boosting speed and increasing FPS (frames per second), there are several ways to maximize the performance of your system for smooth, lag-free gaming. This guide will walk you through practical steps on how to optimize Windows 11 for gaming, covering graphics, speed, and FPS improvement.
1. Update Your Graphics Drivers
The first step to improving your gaming performance is ensuring that your graphics drivers are up-to-date. Outdated drivers can lead to poor performance, crashes, and other gaming issues.
How to Update Graphics Drivers in Windows 11:
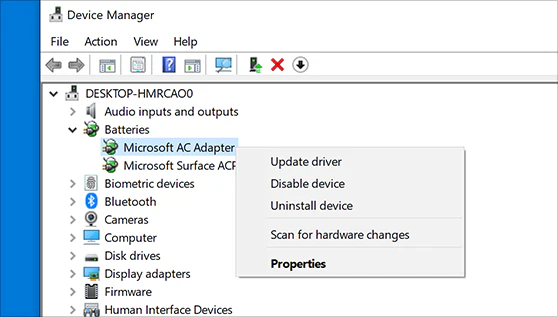
- Step 1: Right-click the Start button and select Device Manager.
- Step 2: Expand the Display Adapters section and right-click your graphics card.
- Step 3: Select Update Driver and choose the option to automatically search for updated drivers.
- Step 4: If you have a dedicated GPU (like NVIDIA or AMD), visit their respective websites to download the latest drivers for your card. Installing these drivers manually can give you additional settings to tweak.
By keeping your GPU drivers updated, you ensure that you’re utilizing the latest performance optimizations and bug fixes, which can drastically improve gaming performance.
2. Enable Game Mode in Windows 11
Windows 11 features a built-in Game Mode, which prioritizes system resources for gaming. This ensures that your CPU and GPU are used optimally while you’re playing.
How to Enable Game Mode:
- Step 1: Open Settings by pressing Windows + I.
- Step 2: Go to Gaming > Game Mode.
- Step 3: Toggle the Game Mode switch to On.
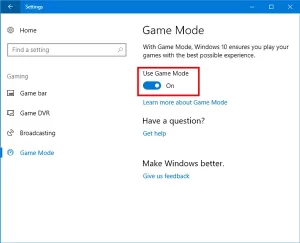
Once enabled, Game Mode will prevent background apps from consuming excessive resources and allow your game to run smoother by prioritizing its performance.
3. Adjust Graphics Settings for Maximum Performance
Windows 11 offers built-in graphics settings that can help enhance your gaming experience. You can adjust the display settings to improve frame rates and visual quality.
Optimize Display Settings:
- Step 1: Right-click the desktop and select Display Settings.
- Step 2: Under the Display section, set your Resolution to the recommended setting for your monitor (usually 1920 x 1080 or 2560 x 1440).
- Step 3: If your monitor supports it, enable HDR (High Dynamic Range) for better visuals.
- Step 4: Scroll down and select Graphics. Here, you can assign the graphics processor (e.g., dedicated or integrated) to individual applications, ensuring the best GPU is used for gaming.
Tip: If you’re aiming for high FPS, lower your resolution and turn off graphical enhancements like V-Sync and Anti-Aliasing for a performance boost.
4. Use DirectStorage for Faster Load Times
Windows 11 supports DirectStorage, a feature that allows games to load faster by utilizing NVMe SSDs. DirectStorage can cut down on load times and improve game asset streaming, especially for open-world games.
How to Enable DirectStorage:
- Ensure that your PC has a DirectStorage-compatible NVMe SSD and Windows 11.
- Install a game that supports DirectStorage (many new titles do).
- Windows 11 will automatically enable DirectStorage if the game supports it. You don’t need to manually activate it.
By enabling DirectStorage, your games can load faster, reducing bottlenecks and providing a smoother gaming experience.
5. Optimize Power Settings for Gaming Performance
Windows 11 power settings can impact gaming performance. For gaming, you’ll want to ensure that your system is set to use the maximum power available.
How to Optimize Power Settings:
- Step 1: Press Windows + X and select Power Options.
- Step 2: Select Additional Power Settings.
- Step 3: Choose the High Performance plan (or Ultimate Performance, if available on your machine).
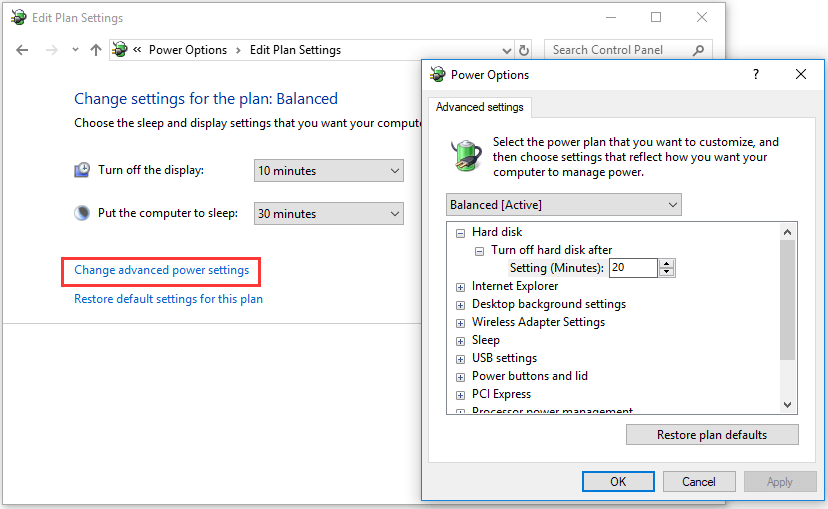
The High Performance plan keeps your CPU and GPU running at their highest clock speeds, ensuring that your gaming experience is as smooth as possible.
6. Disable Background Apps and Processes
Background apps and processes can eat up system resources and negatively affect gaming performance. To maximize your FPS and system speed, it’s important to limit what’s running in the background while you’re gaming.
How to Disable Background Apps:
- Step 1: Go to Settings > Privacy & Security > Background Apps.
- Step 2: Toggle off apps that you don’t need running while gaming.
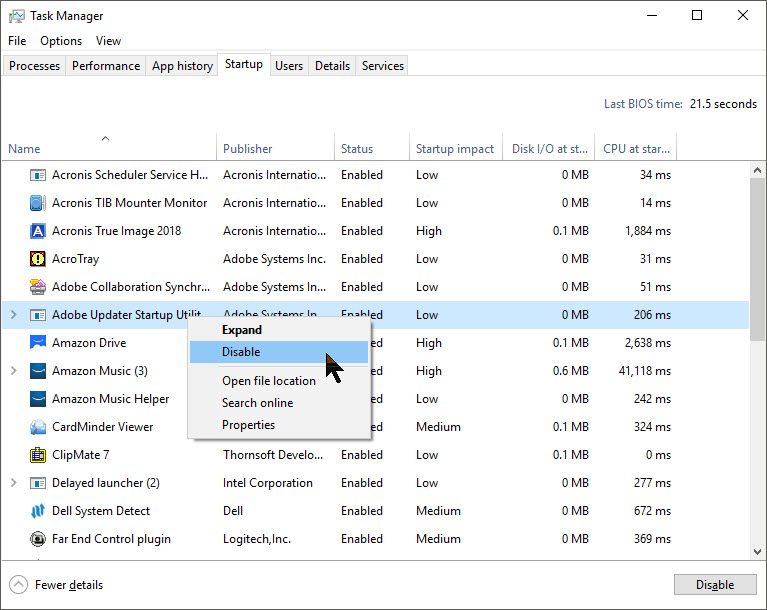
Additionally, you can open Task Manager (press Ctrl + Shift + Esc) and close unnecessary processes that might be using CPU, memory, or disk space.
7. Adjust Virtual Memory (Pagefile) Settings
Virtual memory is a system feature that uses part of your hard drive as additional RAM. If you’re running low on physical memory during gaming, adjusting the virtual memory settings can boost performance.
How to Adjust Virtual Memory:
- Step 1: Right-click This PC and select Properties.
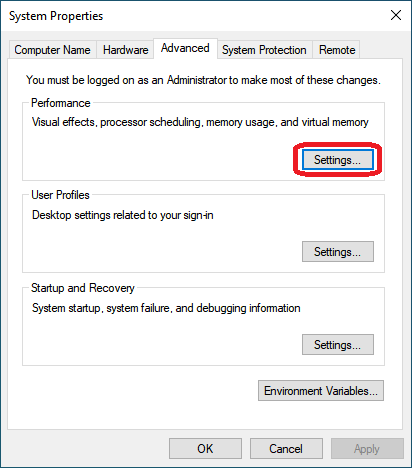
- Step 2: Click on Advanced system settings and go to the Settings under Performance.
- Step 3: In the Performance Options window, go to the Advanced tab and click Change under Virtual Memory.
- Step 4: Uncheck Automatically manage paging file size for all drives.
- Step 5: Select Custom size and set the Initial size and Maximum size to the recommended values based on your system (usually 1.5 to 3 times your RAM size).
By optimizing the pagefile, you ensure that your system can handle larger game files without slowing down.
8. Overclock Your GPU and CPU (If Applicable)
Overclocking your GPU and CPU can lead to higher frame rates and overall better gaming performance. However, this comes with risks, so it’s crucial to proceed with caution.
How to Overclock:
- For GPU: Download GPU overclocking software like MSI Afterburner to increase the clock speed and boost performance.
- For CPU: Access your BIOS settings to adjust the CPU multiplier and increase clock speeds.
Remember to monitor your system temperatures and stability when overclocking, as excessive heat can damage hardware.
9. Disable Unnecessary Visual Effects
Windows 11 includes a variety of visual effects that make the OS look sleek but can also consume resources that could otherwise be allocated to gaming.
How to Disable Visual Effects:
- Step 1: Open Settings > Accessibility > Visual Effects.
- Step 2: Toggle off the visual effects that you don’t need, such as transparency and animations.
You can also access the Performance Options in the System Properties window to turn off various system animations, improving system responsiveness and gaming performance.
10. Enable Hardware-Accelerated GPU Scheduling
Windows 11 features Hardware-Accelerated GPU Scheduling, which allows your GPU to handle certain tasks that would normally be handled by the CPU, reducing latency and improving performance.
How to Enable Hardware-Accelerated GPU Scheduling:
- Step 1: Open Settings > System > Display.
- Step 2: Scroll down and click Graphics Settings.
- Step 3: Toggle Hardware-accelerated GPU scheduling to On.
This feature can help reduce input latency and improve frame rates in supported games.
11. Optimize Your Internet Connection
If you’re playing online games, a stable internet connection is essential for smooth gameplay. Ensure that your Wi-Fi connection is strong, or if possible, use a wired Ethernet connection for the best online gaming experience.
Additionally, consider using Quality of Service (QoS) settings on your router to prioritize gaming traffic, reducing lag during multiplayer sessions.
Conclusion
Optimizing Windows 11 for gaming involves a combination of adjusting system settings, ensuring drivers are up-to-date, and making use of built-in features designed to enhance gaming performance. By following the steps outlined in this guide, you can increase your FPS, reduce lag, and enjoy a smoother, more responsive gaming experience. Whether you’re looking for a graphics boost, a speed increase, or ways to maximize FPS, these tips will help you make the most out of your gaming setup on Windows 11.


