In today’s hyper-connected world, a reliable and seamless Wi-Fi network is essential for smooth browsing, streaming, gaming, and working from home. A mesh Wi-Fi system is the perfect solution for eliminating dead zones and achieving consistent internet coverage across your home or office. Setting up a mesh Wi-Fi system may sound complicated, but with the right guidance, it’s a straightforward process. This article will walk you through everything you need to know to set up a mesh Wi-Fi system for seamless coverage.
What Is a Mesh Wi-Fi System?
A mesh Wi-Fi system consists of a main router and one or more satellite nodes that work together to create a single, unified network. Unlike traditional routers, which rely on a central hub, mesh systems distribute Wi-Fi signals evenly, ensuring consistent speeds across all areas of your space.
Mesh systems are ideal for large homes, multi-story buildings, or any space where a single router struggles to provide adequate coverage.
Benefits of a Mesh Wi-Fi System
- Seamless Coverage: Mesh systems eliminate dead zones by blanketing your entire home with a strong and consistent Wi-Fi signal.
- Unified Network: Unlike Wi-Fi extenders, which create separate networks, mesh systems maintain a single network name (SSID) for seamless transitions.
- Scalability: You can easily add more nodes to expand coverage as needed.
- Advanced Features: Many mesh systems offer app-based controls, parental controls, and integration with smart home devices.
Step-by-Step Guide to Setting Up a Mesh Wi-Fi System
1. Choose the Right Mesh Wi-Fi System
Before you begin, select a mesh Wi-Fi system that suits your needs. Consider the following factors:
- Coverage Area: Choose a system designed to cover the size of your home.
- Number of Nodes: Larger spaces may require more nodes for optimal coverage.
- Speed Requirements: Ensure the system supports your internet speed and bandwidth needs.
- Compatibility: Check if the system integrates with your existing devices, such as smart TVs and gaming consoles.
Popular options include Google Nest Wi-Fi, Eero, TP-Link Deco, and Netgear Orbi.
2. Unbox and Position the Devices
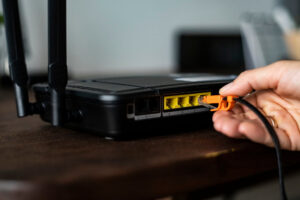
Unbox your mesh Wi-Fi system and identify the main router and satellite nodes. Position the main router near your modem and connect it using the provided Ethernet cable.
- Ideal Placement: Place the router in a central location to ensure even coverage. Avoid placing it near walls, metal objects, or other electronics that may cause interference.
- Node Placement: Position satellite nodes within range of the main router but close enough to areas with weak Wi-Fi signals. Nodes should be in open spaces for optimal performance.
3. Connect the Main Router to the Modem
Plug the main router into a power source and connect it to your modem using the Ethernet cable. Ensure the modem is powered on and functioning correctly.
4. Download the App
Most mesh Wi-Fi systems come with a companion app for easy setup and management. Download the app from the App Store (iOS) or Google Play (Android).
- Popular Apps: Google Home (for Nest Wi-Fi), Eero App, TP-Link Deco App, etc.
- Follow the on-screen instructions to create an account and set up your network.
5. Configure the Network
Using the app, follow these steps to configure your mesh network:
- Name Your Network: Choose an easy-to-remember name (SSID) for your network.
- Set a Password: Create a strong password to secure your network.
- Select Settings: Configure features such as parental controls, guest networks, and device prioritization.
6. Add Satellite Nodes
Once the main router is set up, add the satellite nodes to your network. Follow these steps:
- Power on each node and place it in the desired location.
- Use the app to pair the node with the main router. The app will guide you on whether the node is too far or close to the router for optimal performance.
- Test the connection and adjust placement if necessary.
7. Test the Wi-Fi Coverage
After setting up your mesh system, test the Wi-Fi coverage throughout your space. Use speed test apps or tools to identify weak spots. Adjust the placement of nodes as needed to achieve optimal performance.
8. Optimize the Network
To ensure the best experience, regularly update the firmware of your mesh system. Most apps provide automatic updates to improve performance and security.
Troubleshooting Common Issues
- Weak Signal in Certain Areas:
- Move the satellite node closer to the main router.
- Check for interference from walls or electronic devices.
- Connection Drops Frequently:
- Ensure firmware is up to date.
- Restart the router and nodes.
- Slow Speeds:
- Verify your internet speed with your provider.
- Disconnect unused devices from the network.
Tips for Maintaining a Seamless Mesh Wi-Fi System
- Regular Updates: Keep your router and nodes updated with the latest firmware.
- Monitor Devices: Use the app to monitor connected devices and bandwidth usage.
- Periodic Reboots: Restart the system occasionally to maintain performance.
- Expand as Needed: Add more nodes if you notice new dead zones or expanded coverage requirements.
Conclusion
A mesh Wi-Fi system is the ultimate solution for achieving seamless internet coverage throughout your home or office. By following the steps outlined above, you can set up a reliable and efficient network that eliminates dead zones and provides consistent connectivity. Whether you’re streaming your favorite shows, working from home, or managing smart devices, a well-configured mesh Wi-Fi system ensures a hassle-free experience.
Investing in the right mesh Wi-Fi system and optimizing its placement can significantly enhance your internet experience. With a bit of patience and the guidance provided in this article, you’ll enjoy fast, reliable, and seamless Wi-Fi coverage in every corner of your space.


