Windows 11 is a sleek, modern operating system that brings a refined user experience, but like any other OS, it can slow down over time. Accumulated files, background processes, and outdated software can reduce performance. This guide will walk you through the steps to clean your Windows 11 system and boost its speed for optimal performance.
Why Cleaning Windows 11 is Important
A cluttered PC can lead to sluggish performance, slow startup times, and even crashes. Regularly cleaning your computer helps:
- Free up disk space
- Enhance system responsiveness
- Improve boot time
- Reduce errors and glitches
- Prolong the lifespan of your PC
Follow this step-by-step guide to restore your Windows 11 PC to its peak performance.
1. Uninstall Unused Applications
Over time, you may accumulate applications you no longer use. These programs take up valuable disk space and often run background processes that slow down your PC.
Steps to Uninstall Applications:
- Press Windows + I to open Settings.
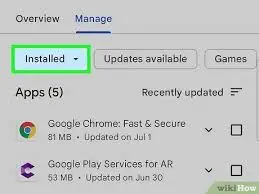
- Click on Apps > Installed Apps.
- Scroll through the list and identify unnecessary programs.
- Click the three dots next to the app and select Uninstall.
Repeat this process until you’ve removed all unwanted software.
2. Disable Startup Programs
Many programs automatically launch during startup, increasing boot time and consuming resources.
How to Disable Startup Programs:
- Press Ctrl + Shift + Esc to open the Task Manager.
- Click on the Startup tab.
- Right-click unnecessary applications and select Disable.
By limiting startup programs, your PC will boot faster and perform better immediately after login.
3. Clear Temporary Files
Temporary files accumulate as you use your PC and can significantly slow down performance if not regularly cleared.
Steps to Clear Temporary Files:
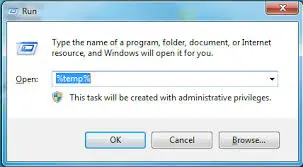
- Press Windows + R and type %temp%, then hit Enter.
- Delete all files in the folder.
- Repeat the process by typing temp and prefetch in the Run dialog.
Clearing these files regularly can free up significant disk space.
4. Use Disk Cleanup Tool
Windows 11 features a built-in Disk Cleanup utility that removes unnecessary files such as system cache, old updates, and more.
How to Use Disk Cleanup:
- Type Disk Cleanup in the Start menu search bar and open it.
- Select your primary drive (usually C:).
- Choose file types to delete (temporary files, system cache, etc.).
- Click OK and then Delete Files.
This tool can free up gigabytes of space and improve performance.
5. Enable Storage Sense
Storage Sense automatically removes temporary files, empties the recycle bin, and deletes unused files.
How to Enable Storage Sense:
- Go to Settings > System > Storage.
- Toggle Storage Sense to On.
- Customize cleanup schedules under Configure Storage Sense.
This automated feature keeps your system clean with minimal effort.
6. Optimize Drives
Fragmented files can slow down your PC by making data access inefficient.
Steps to Optimize Drives:
- Search for Defragment and Optimize Drives in the Start menu.
- Select the drive and click Optimize.
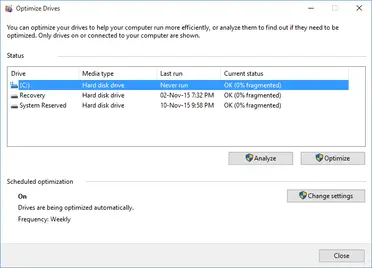
Perform this action monthly for best results.
7. Update Windows and Drivers
Outdated software and drivers can cause lags and errors. Keeping your system updated ensures smooth performance.
How to Update Windows and Drivers:
- Go to Settings > Windows Update.
- Click Check for updates.
- Update drivers via Device Manager by right-clicking devices and selecting Update driver.
Regular updates enhance security and performance.
8. Adjust Visual Effects
Windows 11’s sleek visuals can consume system resources. Adjusting visual effects can boost performance.
Steps to Adjust Visual Effects:
- Press Windows + R and type sysdm.cpl, then hit Enter.
- Go to the Advanced tab and click Settings under Performance.
- Choose Adjust for best performance.
Alternatively, manually deselect options to maintain some visual appeal.
9. Perform Malware and Virus Scans
Malware and viruses can drastically slow down your PC. Regular scans keep your system secure and efficient.
How to Perform Scans:
- Open Windows Security from the Start menu.
- Click Virus & threat protection.
- Select Quick scan or Full scan.
Use reputable antivirus software for deeper scans.
10. Upgrade Hardware
If your PC still lags after software optimization, consider upgrading hardware.
Best Upgrades for Performance:
- RAM: Increases multitasking ability.
- SSD: Accelerates boot and application load times.
- Graphics Card: Enhances gaming and visual performance.
Conclusion
Regularly cleaning and optimizing your Windows 11 PC keeps it running smoothly, enhances performance, and prolongs its lifespan. By following these ten steps, you can ensure your system stays fast and efficient. Incorporating these habits into your routine will lead to a seamless computing experience.


